Fixed Pattern Noise Collaboration
2017-12-20 (revised 2019-04-08) by Bill Claff
Introduction
The
purpose of the collaboration is to collect Fixed Pattern Noise (FPN)
information for a wide variety of cameras.
Any brand and model of camera can be used provided raw data can be captured.
There
are a number of different approached to making these measurements.
The approach taken here simplifies data collection and produces very good
results.
The
well exposed images are used to calculate Pixel Response Non-Uniformity (PRNU).
And the black images are used to calculate Dark Signal Non-Uniformity (DSNU).
PRNU and DSNU are the primary sources of FPN.
Required Image
You
can simply use a white portion of your computer screen or you can use the
following image instead:
The image is preferred because the red and blue channels of the raw data are better exposed.
You can also use any other uniform target other than the computer screen but will need a tripod for consistent images.
Preparing your Camera to take the Images
Choose any lens you
like. Probably it will be easier with a short and light lens.
Try to avoid wide-angle lenses because we need a completely out of focus image.
Set all noise
reduction settings to off (or a low as possible). In particular do not use long
exposure noise reduction.
Do not use ISO Auto.
Remember to take RAW
images.
If your camera does
both 14‑bit and 12‑bit then it is preferable to use 14‑bit.
If your camera
supports electronic and mechanical shutter then use the mechanical shutter.
You will be using
Manual mode and Manual focus. Make sure Exposure Compensation is 0.
Taking the Images
Images
will be taken at the lowest analog ISO, f/4 (higher f-number is OK especially
if the lens is wide- angle) aperture, and at infinity focus.
For most cameras the lowest numbered ISO setting is the lowest analog ISO; but
on some it’s the next ISO setting up.
Infinity focus will produce the most diffuse images for most lenses but
sometimes closest focus is best.
Put
the image on your computer screen or simply open up something that shows a
white screen.
Although the out of focus images will be diffuse, to ensure consistent
brightness we don’t want the camera to move.
So I place the front of my lens directly against my computer screen when
setting exposure and taking the images.
Adjust
your exposure to be 2 stops overexposed and take 16 images.
These will be well exposed but not clipped.
Alternatively, use an evenly illuminated target and a tripod. We simply want somewhat overexposed, evenly lit images.
Here's
a thumbnail of a good image:

Sometime there will be some light fall-off:

Or a gradient:
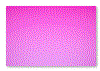
Try you best to eliminate these, particularly the gradient. Stop down a bit if necessary (don't forget to increase the exposure time).
Put
your lens cap on, set your fastest shutter speed, and take 16 of black images.
It's wise to avoid bright light or cover your viewfinder in case there is light
leakage.
Submit your Data
Contact me at BClaff@comcast.net to gain
access to my Dropbox to transfer your files or to arrange for an alternate
method.